-40%
RadioShack Scanner Data-Loading Software and Cable Pro 76 79 89 2016 2017
$ 10.55
- Description
- Size Guide
Description
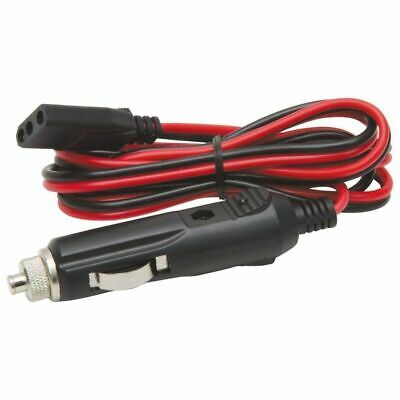
Scanner Data-Loading Software and CableUploads channel and frequency data for selected scanners that use the RadioShack™ Scanner Control Protocol.
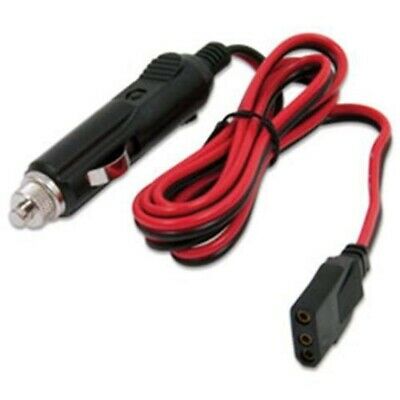
Includes a 6-foot cable and a CD containing software.
Requirements
Windows 95 or higher
1 to 2 MB available disk space
Available RS-232 9-pin male DB9 serial port on your PC
1/8" 3-Conductor female interface jack on your RadioShack™ Scanner
Optional: Transmitting Radio with Mic input from Sound Card for “On-Air” programming of Pro-89s
One or more of the following scanners…
RadioShack™ Cat #
Model Name
Description
20-313
Pro-76
Handheld
20-314
Pro-79
Handheld
20-514
Pro-89
Handheld Race Scanner
20-422
Pro-2016
Base
20-423
Pro-2017
Base
Overview
With Scanner Loader you can store, organize, and upload channels to your RadioShack™ scanner. You can use different files to organize your channels for different interests or areas. For example, if you plan on traveling with your scanner, you can create files for the areas you want to scan. Then connect your scanner to your PC and run Scanner Loader, to upload the channels you want to be able to scan. You only need to type in the channels once, because you can save them in a file on your computer. Once you have typed them in, you will not need to program your scanner by hand every time you want to change channels. You can also share your files with friends, or borrow someone else’s files. You may also want to create files of channels for special events like air shows, auto racing, aviation scanning, etc.
Each file of channels is composed of the following fields and is stored in a FoxPro .DBF file format.
Name
Type
Width
Decimals
Channel #
Numeric
4
0
Frequency
Numeric
15
9
Delay
Logical
1
0
Lockout
Logical
1
0
Priority
Logical
1
0
Car#
Text
20
0
Category
Text
20
0
Description
Text
44
0
Channel #, Frequency, Delay, Lockout, and Car # correspond to the scanner.
The Category field is a text field used to describe the type of user of a particular channel, such as “Fire”, “Police”, “Air”, “NASCAR”, “IRL”, etc.
The Description is a text field used to described in more detail what a channel is, such as “Hurst FD F1”, “DFW Tower”, “Jeff Gordon Channel 3”, etc.
Note:
Category and Description fields are not uploaded to the scanner, and Car # is only uploaded and available for the Race Scanners.
Scanner Loader’s main window is divided into two areas using tabs.
Use the Upload tab to select the channels in the file that you want to upload to your scanner, or enter a single channel in the upper area of the window, to upload.
Use the Edit tab to add, change, and delete individual channels in the file.
Configuration
You must tell Scanner Loader what scanner you will be using and to which serial or “Com.” port it is connected.
From the main window of Scanner Loader, choose the TOOLS|CONFIGURATION menu to open the Configuration window.
Next, choose the scanner from the list that you will be uploading to.
Then, choose the Com. Port (also known as serial, or RS-232 port) to which your scanner will be connected, or “On-Air” if you will be using your sound card and a transmitting radio to program one or more Pro-89 model scanners.
Note:
The Com. Port is
not
a Universal Serial Bus (USB) port.
In the configuration window you can also tell Scanner Loader whether you want to be prompted to make your scanner ready before each upload. Once you have become used to Scanner Loader, you may want to uncheck this option.
Use the Configure On-Air (SCCOMSND.OCX) Control button to change its settings. The default values are as follows (some adjustment may be necessary).
Start Bit
1
End Bit
2
Previous Send
100
After Send
100
Volume
100
Create a File
From Scanner Loader’s main window, choose the FILE|NEW menu to create a new file of channels. You will be prompted to create the file with a default name, or you can change the name to something more descriptive.
Open a File
From Scanner Loader’s main window, choose the FILE|OPEN menu to open a file of channels.
Notes:
1. When you start Scanner Loader, it automatically attempts to open the last file you were working with.
2. The category.dbf file stores category names and cannot be opened using the FILE|OPEN command. To open and edit the category.dbf file, choose the MANAGE|CATEGORIES menu.
Edit a File
To edit (add, change, and delete channel records) a file, you must first have a file open, and be using the Edit tab on Scanner Loader’s main window.
To add a record, click the plus sign (+) button on the navigation control, and then fill in the fields for the record. To save the new record, move to another record or click the checkmark button on the navigation control.
To edit a record, simply change the fields, and save the changes by moving to another record, or click the checkmark button on the navigation control.
To delete a record, move to the record you want to delete, and click the minus sign (-) button on the navigation control.
Use the following controls on the Edit tab to edit channel records.
Channel text box
- Enter a channel number where you want the channel to be stored in the scanner. You can also upload channels starting at a particular channel in the scanner, so entering a channel number is not required.
Frequency text box
- Enter a frequency for the channel. Only frequencies that the scanner is capable of tuning can be uploaded. However, it is OK to include those frequencies that are out of range in Scanner Loader’s channel files.
Car # text box
- This control is only visible if you are using a Race Scanner that supports the Car # label. Enter a car number. For example, 3, 03, 1, 99, 100, etc.
Delay checkbox
- Check if you want a delay on this channel.
Lockout checkbox
- Check if you want to lockout this channel.
Priority checkbox
- Check if you want to make this channel a priority channel.
Category text box
- Enter a description of the type of frequency that this channel is. For example, “Fire”, “Police”, “EMS”, “NASCAR”, “Aviation”, etc. You can also choose a category from the dropdown listbox. See Manage Categories for more information.
Description text box
- Enter a description of the channel. For example, “Hurst F1”, “Jeff Gordon”, “D/FW Airport Tower”, etc.
Navigation control
- Use the navigation control to do the following…
Move to the first channel record
Move to the previous channel record
Move to the next channel record
Move to the last channel record
Add a new channel record
Delete a channel record
Edit a channel record
Save changes to a channel record
Undo changes to a channel record that has not been saved yet
Easy Add checkbox
- Check if you want Scanner Loader to calculate the next channel number, and remember the Category and Delay from the previous channel record you added, when adding a new channel.
Channel grid
- With the channel grid you can see many of the channels in the file at once. You can also use the grid to move to a particular record by clicking on the row that record is on.
Save a File
From Scanner Loader’s main window, choose the FILE|SAVE AS menu to save the current file with a different name. You will be asked if you want to keep a copy of the file using the old name, otherwise, the original will be deleted.
Note:
Changes to Scanner Loader’s files are automatically saved as you add, change, and delete channel records.
Upload Channels
To upload channels you must first be using the Edit tab on Scanner Loader’s main window.
The first row of controls on the Upload tab can be used for uploading single channels to the scanner without having to use a channel file. The frequency, car #, delay, lockout, and priority fields correspond to the scanner to which you are uploading. The Upload Single Channel button begins the upload process to your scanner.
The second row of controls describes where Scanner Loader will upload the channels in your scanner. You can use the Upload to Scanner Bank dropdown listbox to set the Start At and Stop At channel number spinners to match a bank in your scanner, or you can enter the Start At and Stop At channels numbers independently of the Upload to Scanner Bank control.
The third row of controls is enabled when you have a channel file opened, allowing you to upload channels from the file to your scanner.
Use the Select All and Select None buttons to quickly select and deselect all channels in a file for uploading.
Scanner Loader allows you to upload channels to the corresponding channel numbers in your scanner when you check the Match File’s Channel Numbers checkbox. Otherwise, uploading will begin at the Start At channel number, and stop at the Stop At channel number described above. In either case, you begin the uploading by clicking the Upload Selected Channels button.
The QuickLoad button is for quickly loading all valid channels from current file into the model scanner you choose from a list box. This is handy for RadioShack™ stores and others who might need to program the same file to many different models often.
Manage Categories
Scanner Loader uses dropdown lists boxes in the program to speed up data entry.
Anywhere in Scanner Loader where there is a dropdown list box for the Category field, you can type the first few letters of an item included in the list and then press DOWN ARROW, and Scanner Loader will complete spelling the rest of the word. Of course you can also click the down arrow button on the dropdown list and choose the item with your mouse and a click.
Many popular categories are already included for you. However you can add, change, and delete the categories to suit your needs. For example, here are several common categories: "Fire", "Police", "Public Works", “Air”, etc
From Scanner Loader’s main window choose the TOOLS|MANAGE CATEGORIES menu to open the Categories window.
Navigation control
- Use the navigation control to do the following…
Move to the first category record
Move to the previous category record
Move to the next category record
Move to the last category record
Add a new category record
Delete a category record
Edit a category record
Save changes to a category record
Undo changes to category record that has not been saved yet
Close button
- Returns you to the main window.
Pack button
- Physically removes records marked for deletion. If you add something called "Fred", and then delete it, you won't be able to add another item named "Fred", until you have used the Pack button.
Help button
- Opens the help file.
Note:
Category names are stored in the category.dbf file.
Scanner Loader - Copyright © RadioShack™ Corporation 2000-2001
Software written for Windows 95 will not necessarily run on your computer with a newer operating system installed.
Your computer might not have a serial port.
► Item Condition: New in factory sealed package.
► Package Condition: Minor shelf wear.
► Warranty: 30 Days
► RadioShack Cat. No. 20-048
► Visit our eBay store OnLineCentral to view more Radio Shack accessories.
► Thank you for looking.

